Guide to Carts
Basic cart usage | Saving and sharing carts | Managing multiple carts | Tutorial video
Basic cart usage
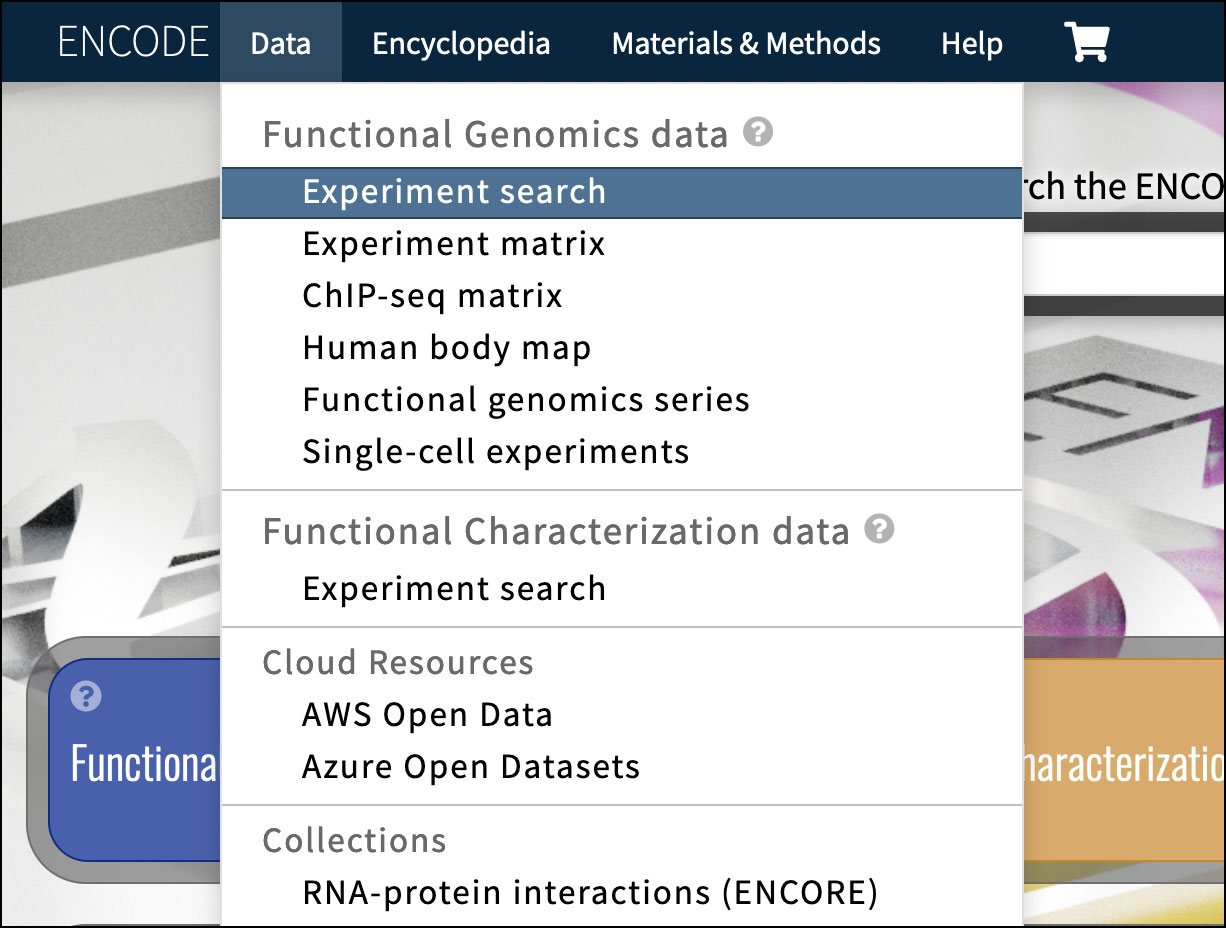
ENCODE portal carts allow you to group an arbitrary set of experiments into a container. As with search-result pages, you can easily generate a list of downloadable URLs for all files in all experiments in your cart along with experimental metadata for all files you download.
You need to have an ENCODE portal user account and to be logged in, in order to create carts, add experiments to carts, save carts and share them with others. To learn about user account creation process see the section “Creating a new user account”.
Adding many experiments to your cart.
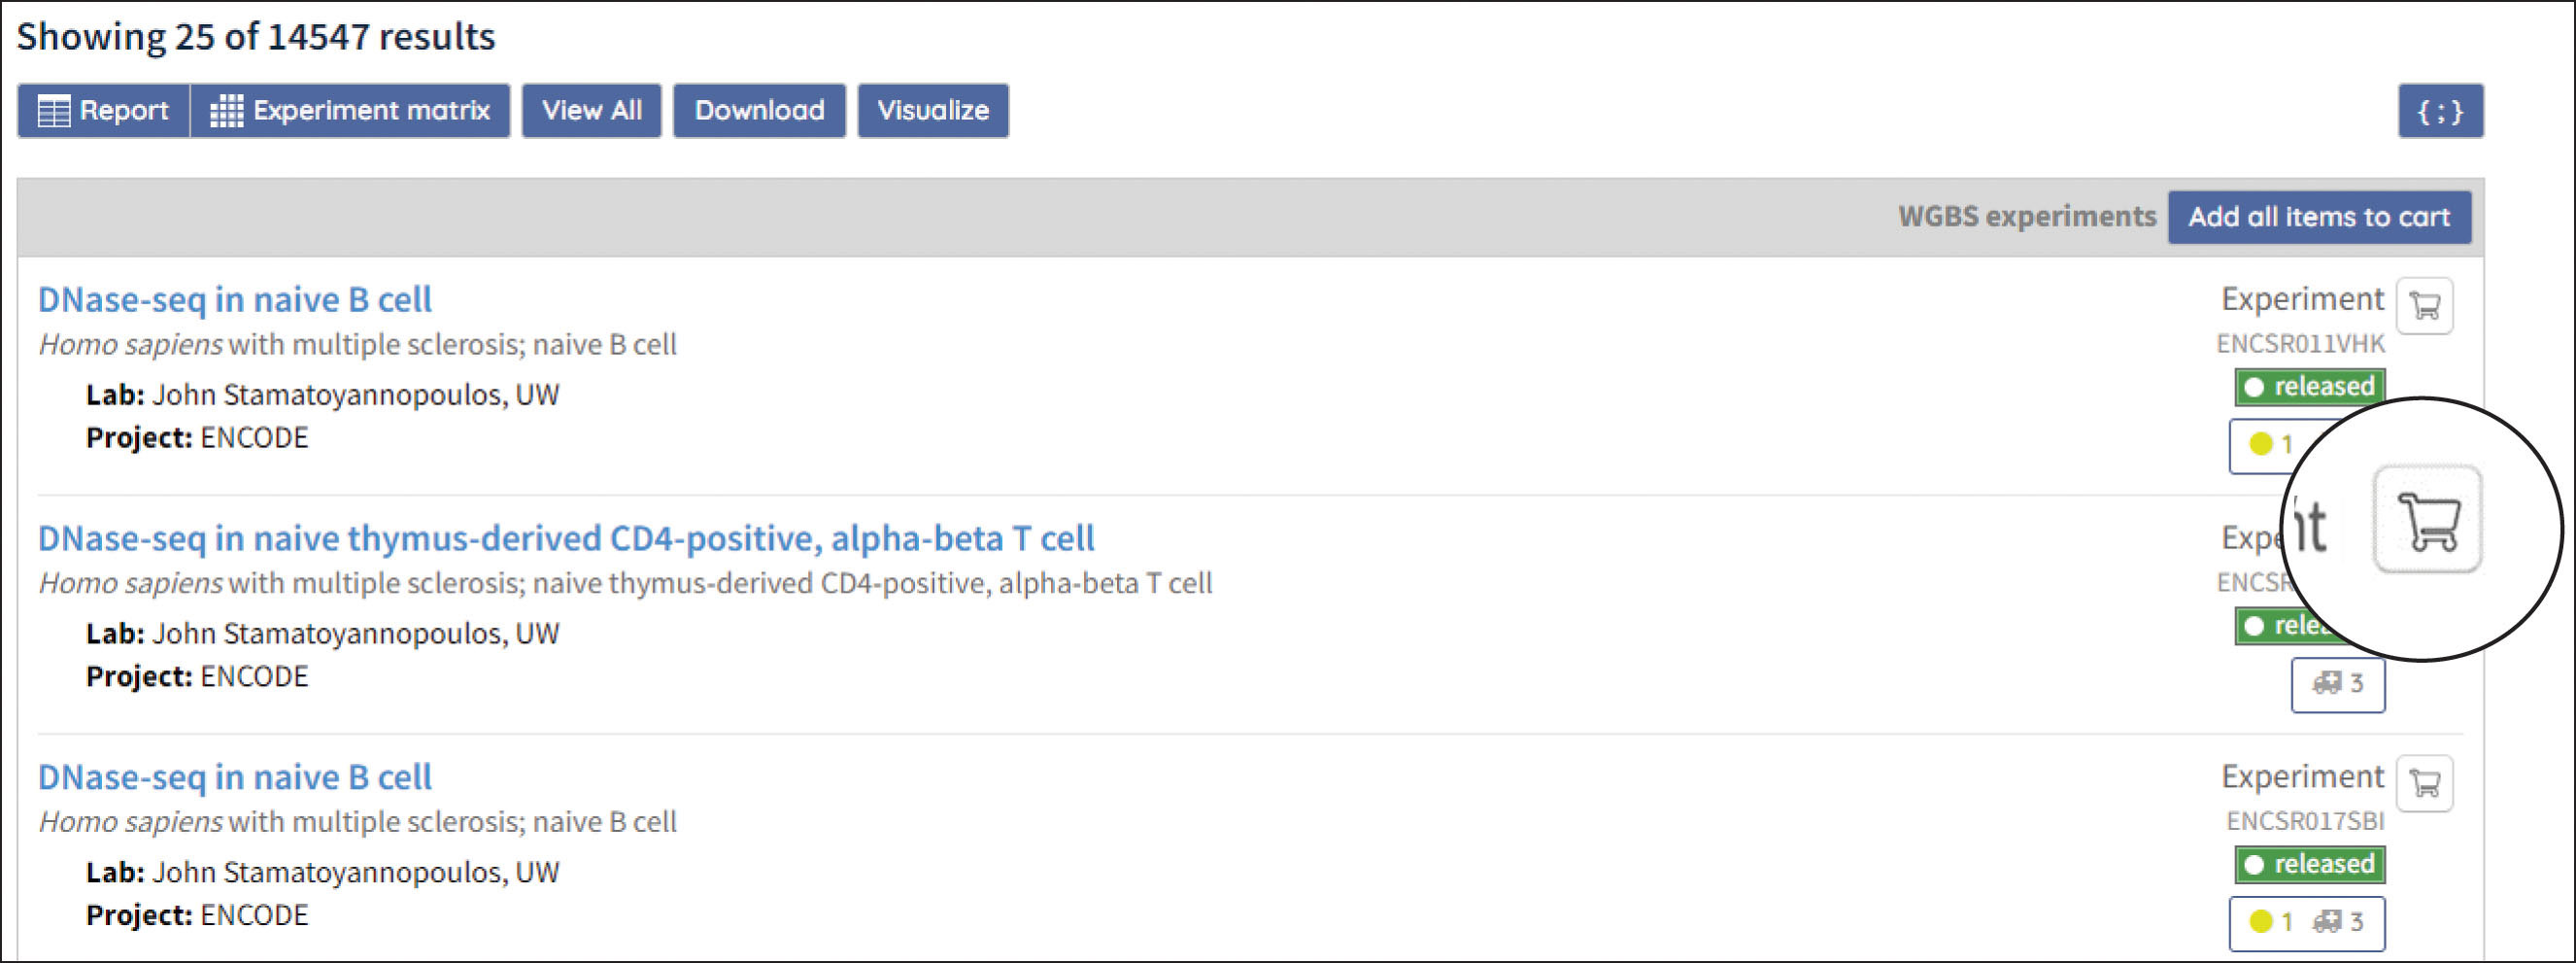
The search-results page has a convenient way to add experiments to your cart at once.
Any experiment in your search results displays a cart button to its right. Carts can contain experiments, functional characterization experiments, and experiment series.
Carts can contain up to 8000 experiments, but a large number of experiments in your cart can cause certain operations to take a long time to complete. Filtering your experiments down to as small a set as possible helps keep the performance of cart operations high. The following example has the assay title "Histone ChIP-seq" and biosample "psoas muscle" filters selected which reduces the number of search results to 11 experiments.
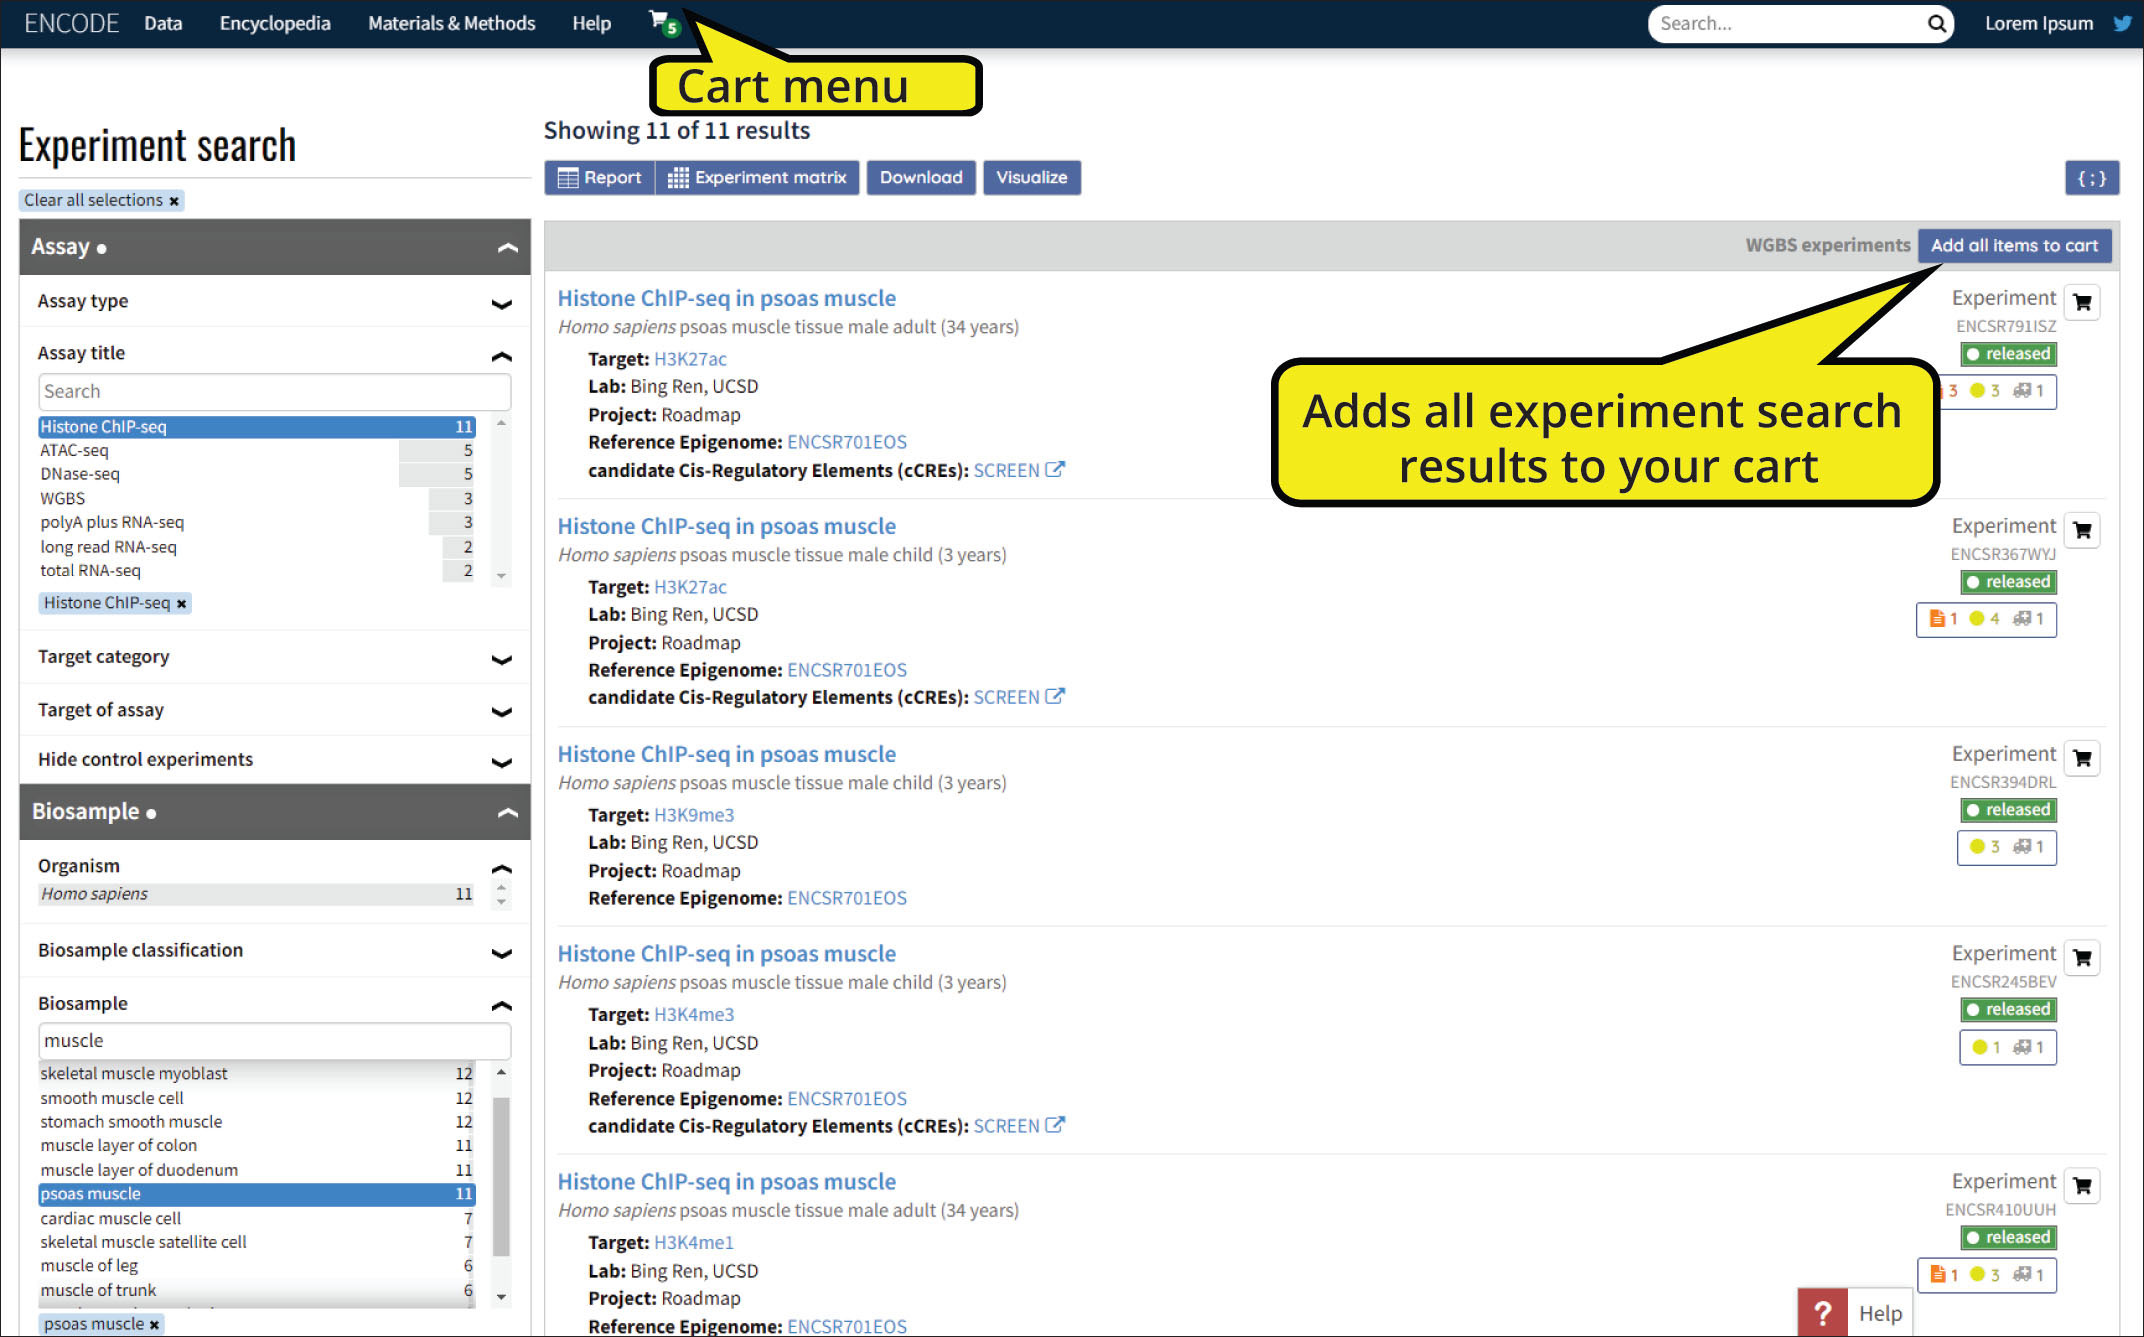
With these 11 experiments selected, clicking the “Add all items to cart” button adds them to your cart, and a cart menu that shows the number of items in your cart appears next to the Help menu.
Viewing your cart
Choosing “View cart” from the cart menu takes you to the Cart page with the https://www.encodeproject.org/cart-view/ URL. Unlike most ENCODE portal URLs, this URL only shows your cart contents in this web browser window, and other people going to the same URL don’t see your cart but might see their own cart contents, and you don’t see these cart contents in a different browser window.
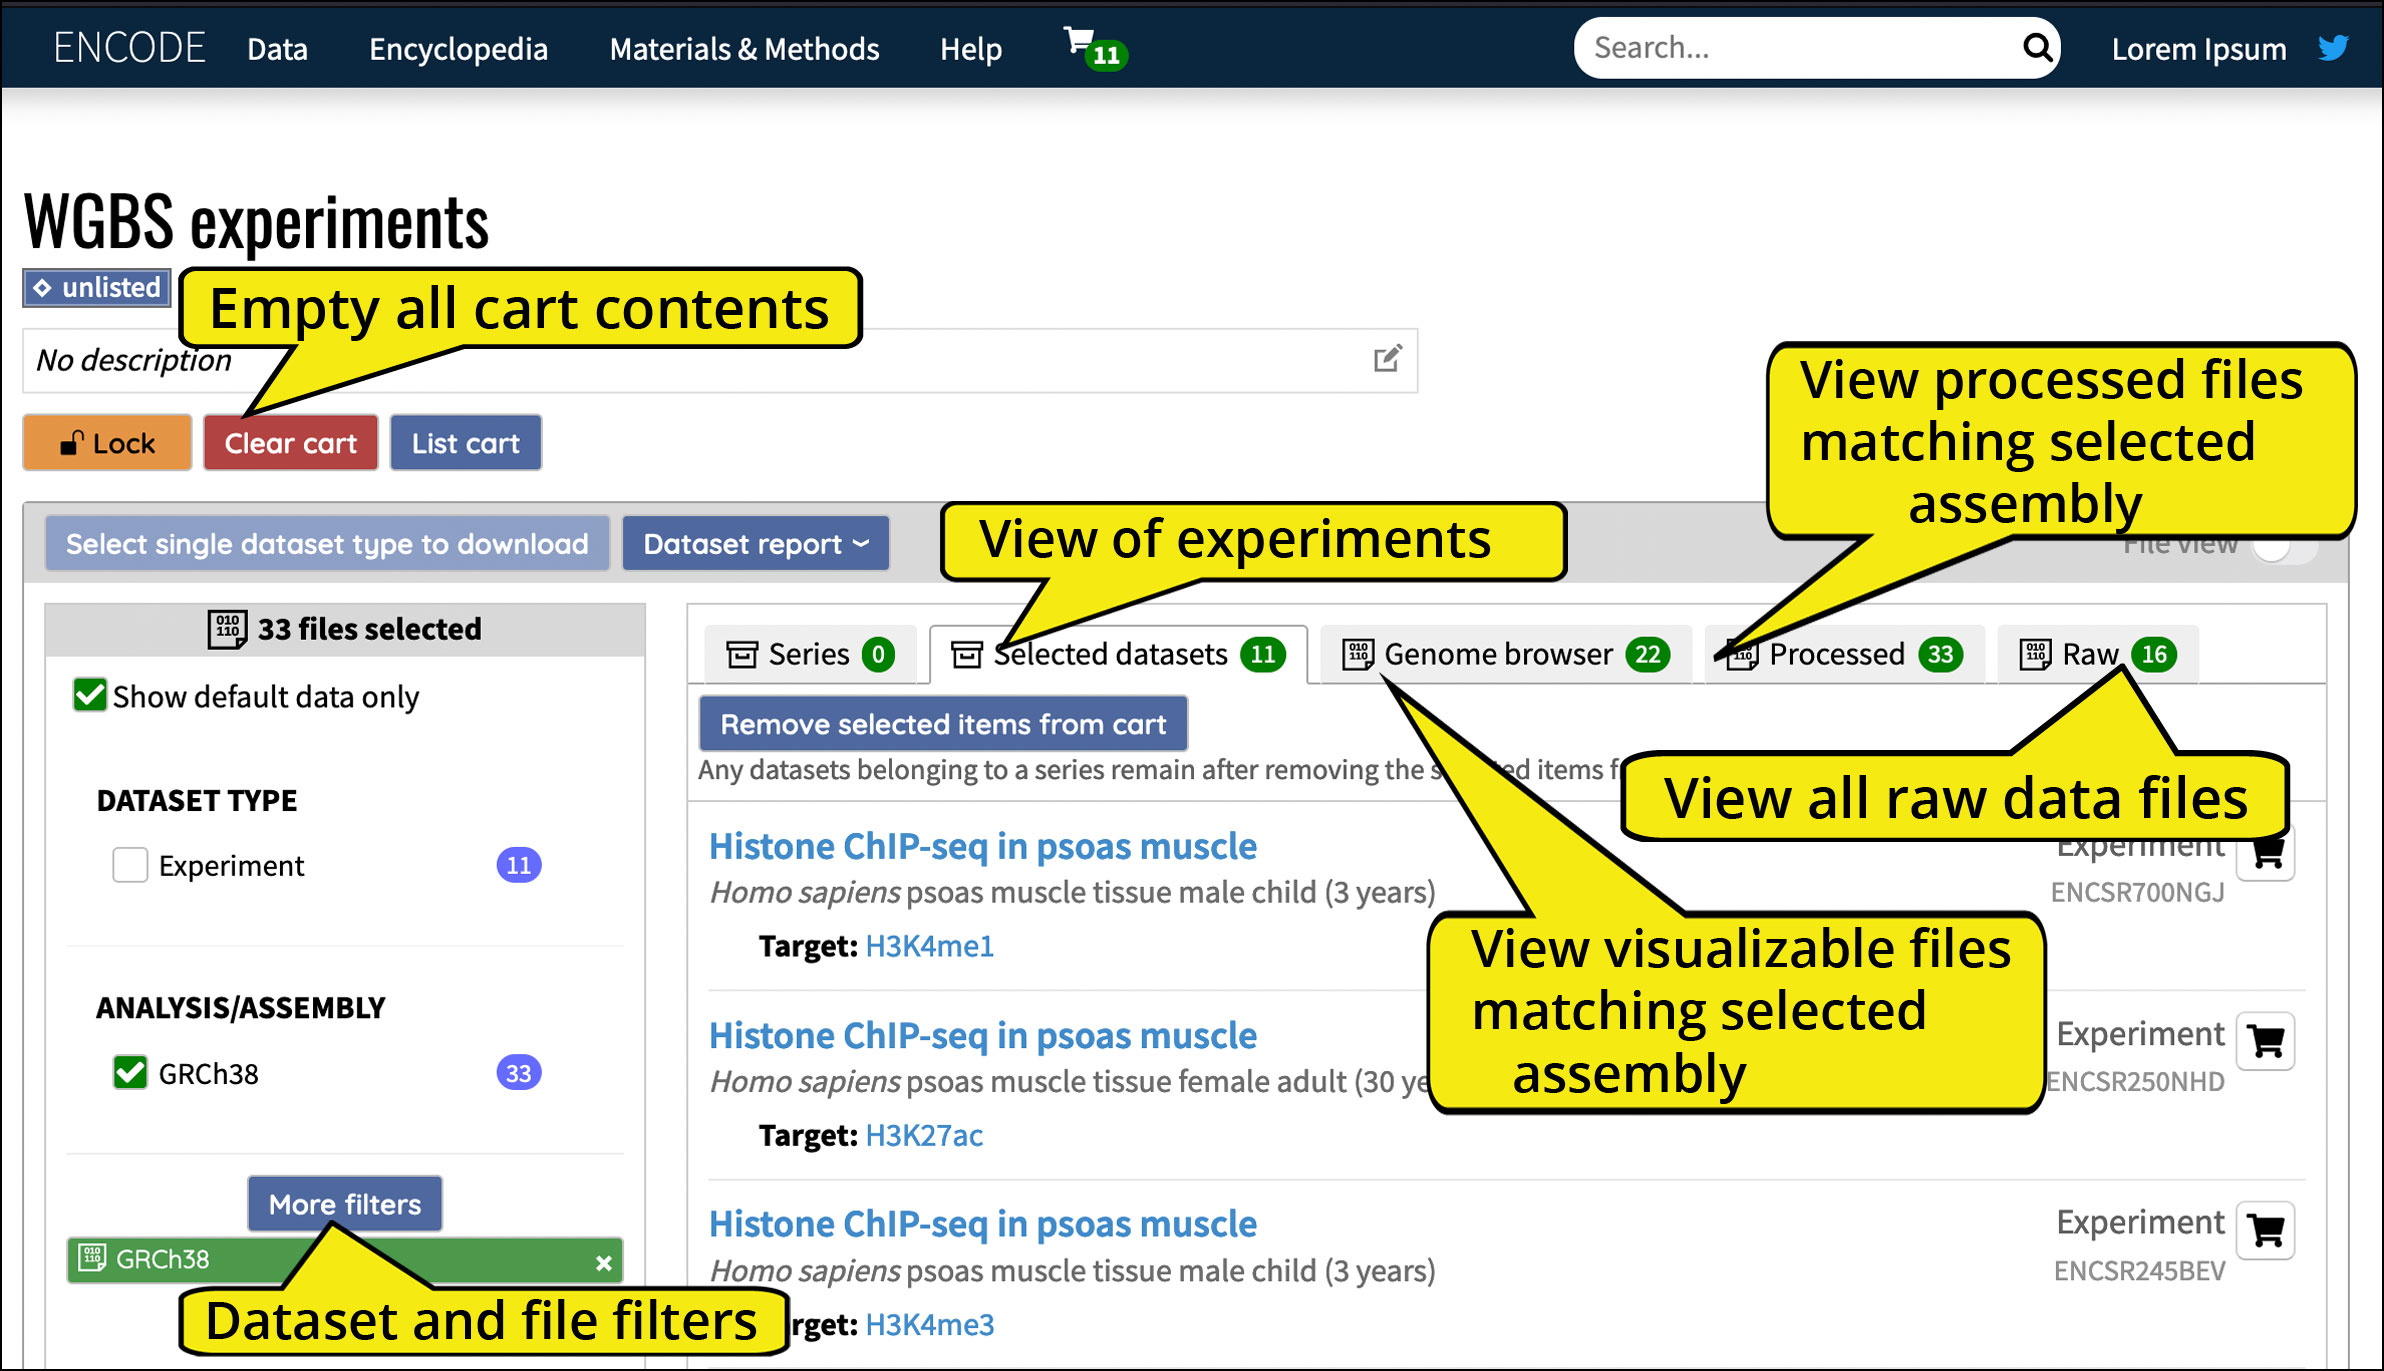
Different views of your cart appear in the main portion of this page, while the "More filters" button appears on the left. These sets of filters allow you to select a subset of your experiment’s files to view and download.
Selected datasets tab
The main portion of the Cart page initially displays a list of the experiments in your cart. You can only see up to 25 experiments at a time, and in case you have added more than 25 datasets to the cart the pager in the upper-right corner will let you move between the pages of 25 experiments. You can use the cart icons on the right side to immediately remove specific experiments from your cart.
The file property filters do not affect the contents of your Datasets tab. This tab simply displays a list of all the datasets in your cart regardless of the files from those datasets that you have selected.
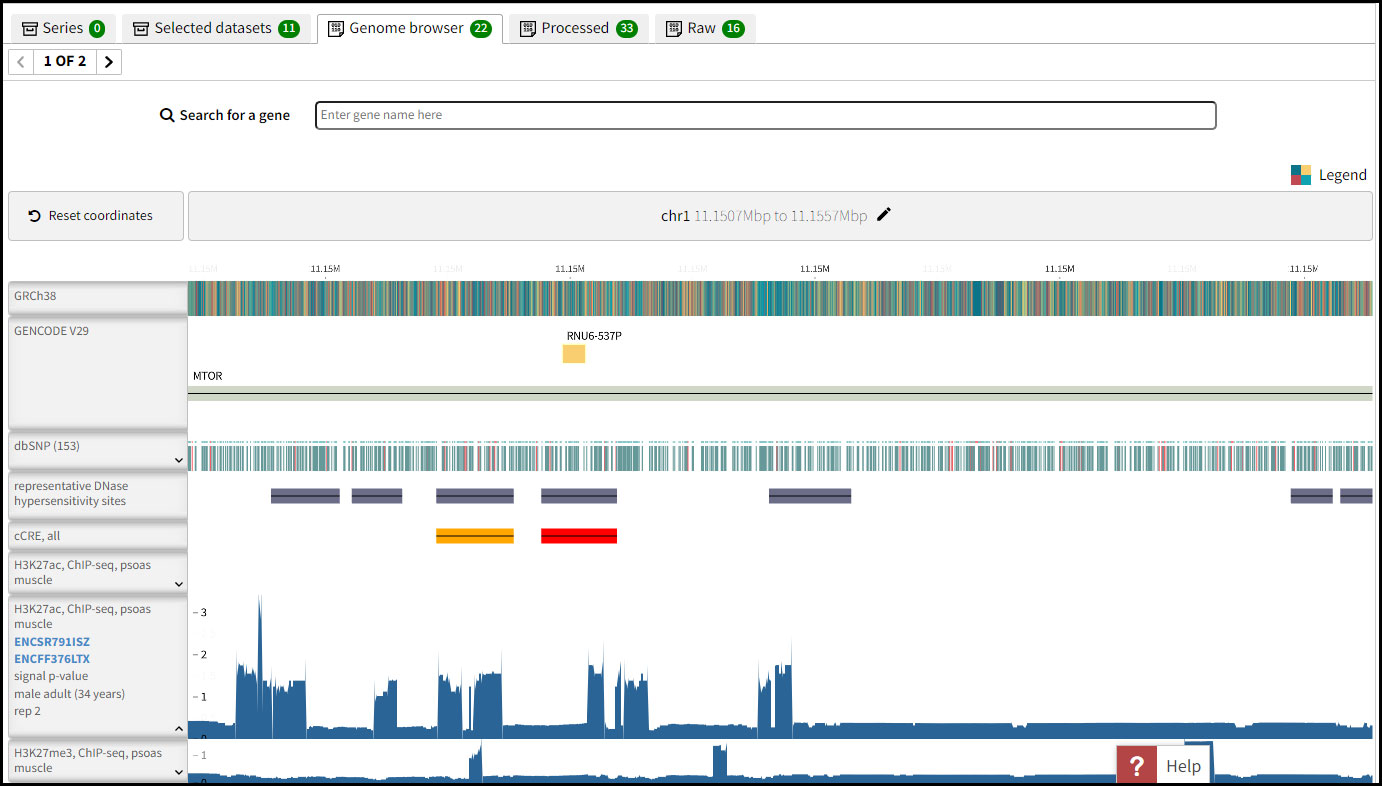
Genome browser tab
This tab shows genome browser tracks for all files selected by the file property filters. Only files visualizable on the ENCODE portal embedded genome browser populate this tab. Selecting filters with a small visualization icon to their right selects files that appear in these tracks. If you only select filters with no visualization icon, no files appear in this view.
If you only have an interest in visualizable files, click on "More filters" and select the “Show visualizable data only” checkbox above the ANALYSIS/ASSEMBLY section so that only filters that select visualizable files appear. Note that “Show visualizable data only” checkbox appears when you have “Show default data only” turned off.
Processed tab
This tab displays all processed data files in the datasets in your cart. Since the processed files usually have designated assembly, you only see the files matching the currently selected assembly filter.
Raw tab
This tab displays raw data files in the experiments in your cart that lack an assembly. The files in this view do not use the file property filters at all.
Downloading files
You have up to five options for downloading the files belonging to the experiments in your cart. If you don't have at least one assembly selected in the fasets, you will be limited to three options. Note that you have to select exactly one dataset type to activate the download button. Upon clicking the "Download" button a "Using batch download" window pops out. You can select the arrow on the right corner to display the download options.
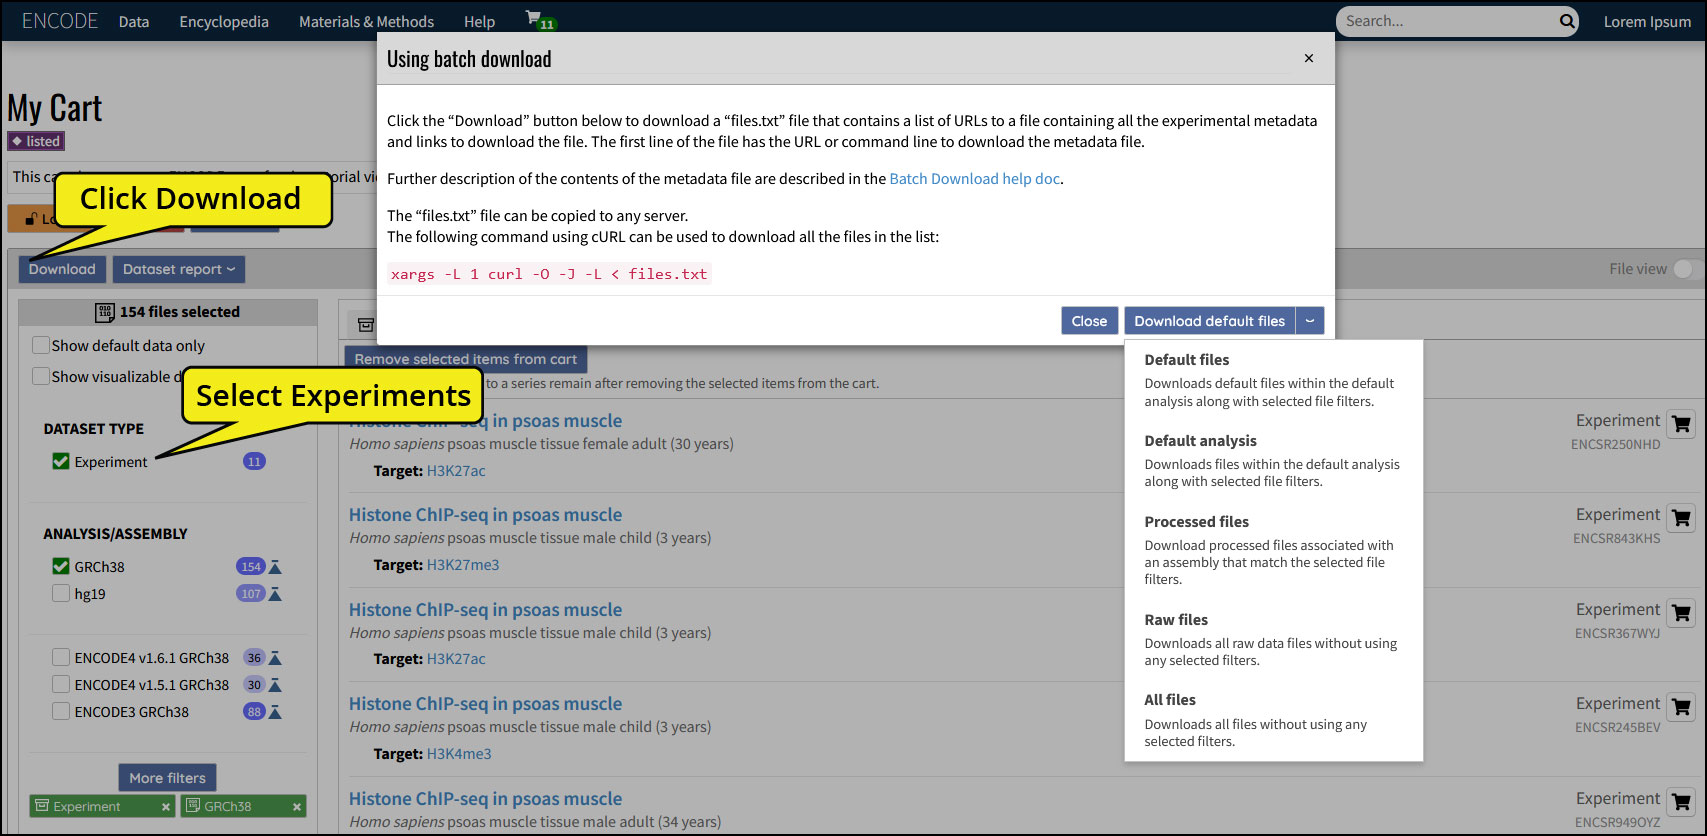
Default files option
This option downloads only the preferred default files within the default analysis along with selected file filters.
Default analysis option
This option downloads all files in default analysis along with selected file filters.
Processed files option
This option downloads all the files that appear in the “Processed data” tab, and are subject to all your selected filters.
Raw files only option
This option downloads all the files that appear in the “Raw data” tab. The selected filters do not affect this option.
All files option
This option downloads all the files in all experiments in the cart. The selected filters do not affect this option.
These five options decide what the download button does. So first choose one of these options from the menu, then click the button to its left to begin the process of downloading files.
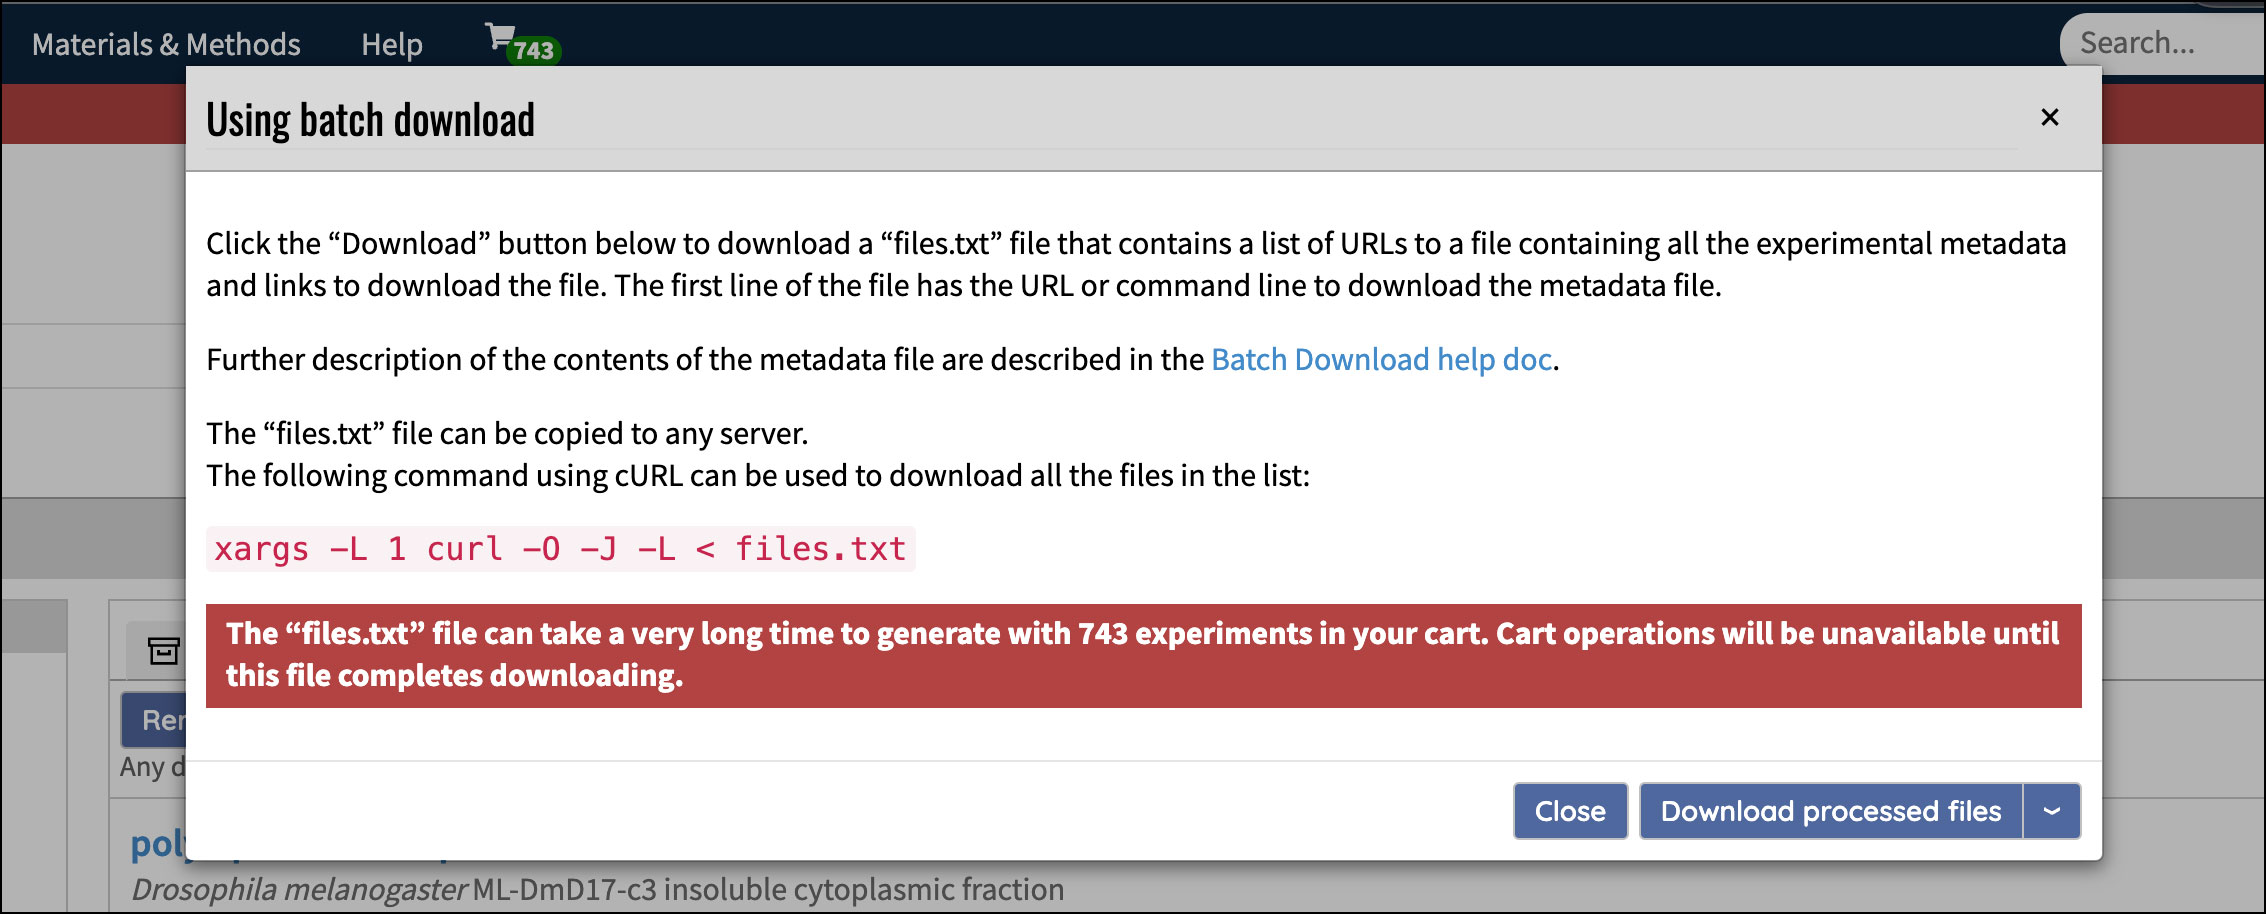
Once the download completes, a file called “files.txt” gets generated that contains the URLs of all the selected files, as well as a line to generate and download a “metadata.tsv” file that contains a listing of the same files along with their experimental metadata.
If you have more than 500 experiments in your cart, you also see the warning in red. Clicking the Download button when you have a large number of experiments in your cart can result in a long delay before the “files.txt” file begins downloading. During this delay, you can still use the portal, but buttons that modify your cart appear dimmed until “files.txt” has finished downloading.
Adding and removing individual experiments
In addition to adding multiple experiments to your cart and clearing your cart, you can also add and remove individual experiments.
As mentioned before, the search-results page shows a cart button to the right of experiments. This button appears filled in for experiments currently in your cart, and as an outline for experiments not in your cart. Clicking the cart button of an experiment in your cart removes it from the cart, and the button appears as an outline. Clicking the cart button of an experiment not in your cart adds it to your cart, and the button appears filled in.
You can also add and remove experiments on individual experiment pages using a button above the summary.
Clearing your cart
Once you no longer need your cart, click the “Clear cart” button on your cart page. You get a chance to back out of this action, or to continue. Once you clear your cart, you cannot bring its contents back.
Saving and sharing carts
The only thing you can do with carts while not logged in is to view existing carts. Once you have signed in with your user account on the ENCODE portal, you will have several abilities, including:
- Saving your carts so they can be recalled
- Sharing saved carts with others
- Adding more than 8000 items to your carts, with a corresponding performance penalty on the cart page as you add more items
The following sections describe additional cart abilities when you have signed in.
Members of the ENCODE consortium often have user accounts assigned to them. But anyone can create an account to take advantage of the cart features. See the section “Creating a new user account” below.
Saving your cart
Carts get saved to the ENCODE portal automatically as you add and remove items — you don’t need to specifically save your cart. You can view your carts on different browsers and computers, and you don’t lose them by reloading the browser window or going to a different website.
Sharing your cart
You can share your cart with others through the “Share cart” item in your cart menu.
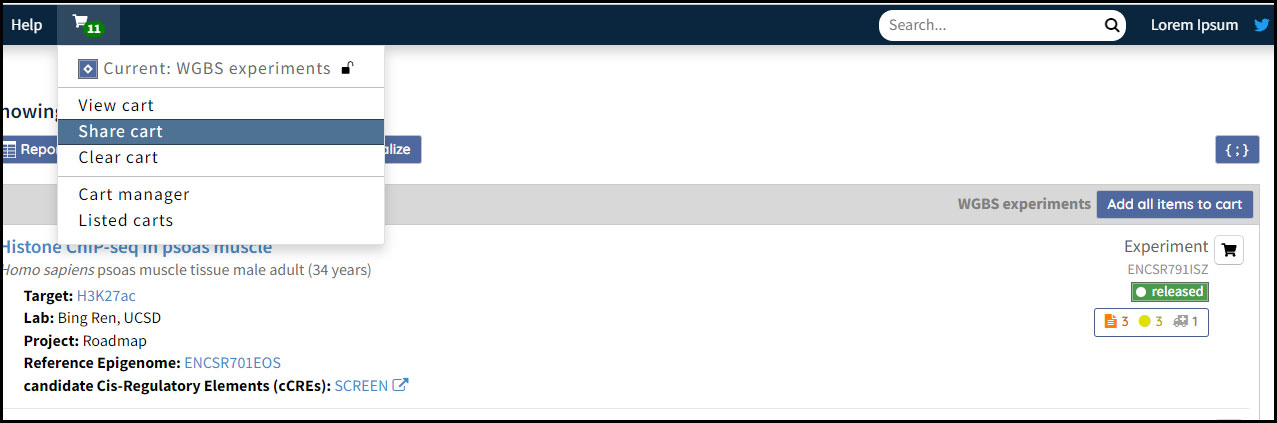
Selecting this item brings up a dialog box that lets you copy the unique URL to your cart. Others who visit this URL can see the contents of your cart, though they cannot modify your cart — only you can modify your own cart.
Creating a new user account
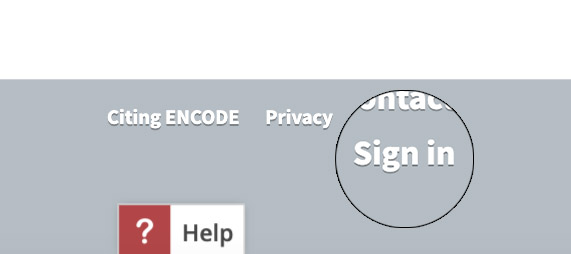
Anyone wanting to take advantage of cart features associated with an ENCODE portal user account can create a new user account themselves. Scroll to the bottom of any page on the ENCODE portal and click the “Sign in” link. You can also use the user icon at the top right of the page.
A pop-up appears with three login service options. Choose a service on which you already have an account and follow their sign-in instructions. When a message appears that says, “You are about to create an ENCODE account…” click the “Proceed” button. This creates your account and automatically signs you in. You can sign in with that account in the future.
You can tell you have signed in if your name from that login service appears next to the search box at the top of the page. You can sign out at any time by choosing the “Sign out” option in the menu that appears when you hover over your name or click on it.
Managing multiple carts
Users can have up to 30 independent carts, each containing its own set of experiments that can overlap with your other carts’ sets of experiments. You set one of your carts as the “current cart,” and all of the operations described above apply to that cart until you set another of your carts as the current cart.
Each cart has a name that must be unique among all your carts. You can also optionally assign an identifier to each cart that you can use in the URL for your cart when you share it. This identifier must be unique among all carts in the system, even if they belong to other users.
Cart Manager
When logged in, choose the “Cart manager” option from the cart menu which brings up a page showing a list of all the carts belonging to you.

Adding a new cart
To add new carts, click the New cart button at the upper-right corner of the list. This brings up a modal that lets you specify the name and optional identifier for the new cart.
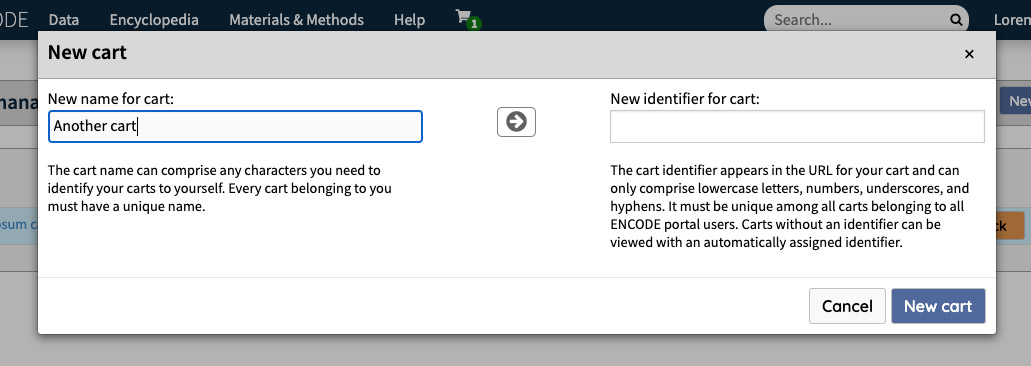
The notes below each field describe the limitations for the name and identifier. The arrow button in the middle lets you toggle automatic-transfer mode, so clicking it enables the automatic transfer of the name you enter to the identifier (the button appears with a dark background) and clicking this button again disables automatic transfer. While you have automatic transfer enabled, anything you type into the name field gets copied to the identifier field but modified to work better as a part of a URL, so spaces get converted to dashes, and anything not a standard letter or number gets converted to dashes or ignored depending on what those characters are. You can also type directly into the identifier field, with the same limitations on the kinds of characters you can enter.
Once you feel satisfied with the name and optional identifier, click the New cart button to create this cart, and you then see your new cart in your list of carts. If you had left the identifier field blank, the new cart has all the same abilities as any other cart but it gets an automatically assigned identifier.
Setting the current cart
You only work with one cart at a time, so you need to set one of your carts as the “current cart.” You do this in the cart manager by clicking on the cart name in the list of carts, which opens the cart, and also highlights that cart in blue. Once you do that, all cart operations — adding to the cart, viewing the cart, downloading the cart’s files, etc. — apply to that cart.
While all your carts and their contents are part of the ENCODE database, your web browser keeps track of the current cart. If you switch to a different browser or a different computer, you could see a different cart set as the current cart.
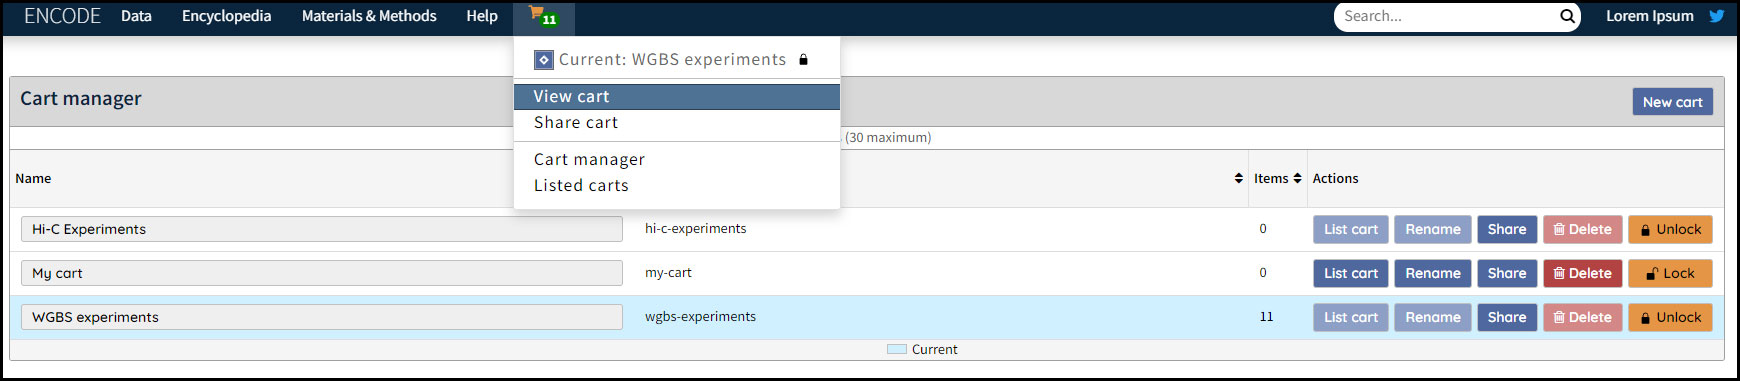
Renaming, sharing, and deleting carts
The Actions column of the cart manager has the five operations you can perform on a cart: list cart, rename, share, delete and unlock.
Listing a cart causes it to appear on the "Listed carts" page in the cart menu. You must add a description of your cart to list it. You can format the text with Markdown syntax.
Renaming a cart brings up the same dialog box as creating a new cart and gives you the same options.
Sharing a cart brings up the same dialog box as sharing a cart from the cart menu. However, you can share any cart with the cart manager whether the current cart or other carts.
Locking a cart prevents any updates of its content. You can not delete a locked cart.
When you delete an unlocked cart and confirm that you mean to delete it, you can no longer retrieve that cart. Deleting a cart also frees its identifier if it had one — its identifier becomes available for other carts. You cannot delete the current cart; to delete a cart you have to set a different cart as the current cart first.